
Windows can’t get the network settings from the router [7 fixes]
[ad_1]
- A Windows can’t get the network settings from the router can be a frustrating and time-consuming issue.
- It affects your ability to connect to your router, thus effectively cutting you off from your internet supply.
- Some of the solutions involved in fixing this error might include restarting your router, checking that your drivers are updated, and running your troubleshooter.
XINSTALL BY CLICKING THE DOWNLOAD FILE
Facing connection issues with your Wi-Fi and Widows device can be frustrating and time-consuming. Yet, without fixing it, there is usually no way to connect to the internet.
Sometimes, you will get a Windows can’t get the network settings from the router error when trying to connect to your router.
Whether this is the first time you are connecting to the router or not, the issue can go as far as affecting your work or other activities that require an internet connection throughout the day.
Luckily there exist a few fixes that will restore your network connectivity and have you happily surf the internet in no time.
Here are 7 fixes for the Windows can’t get the network settings from the router error.
Common causes for this error appearing
There are several reasons why your Windows device might fail to connect to your router.
Some users experienced this issue after upgrading to Windows 10 while others experienced the same issue after trying to connect to a wireless HP printer.
This shows that the issue is not isolated to Windows devices and can also affect other devices that connect to the router such as your wireless printer and TP-link extender.
Some of the most common reasons for encountering this issue include
- Bad credentials
- Missing updates
- A problematic router
How to fix the Windows can’t get the Network Settings error?
1. Check your network credentials
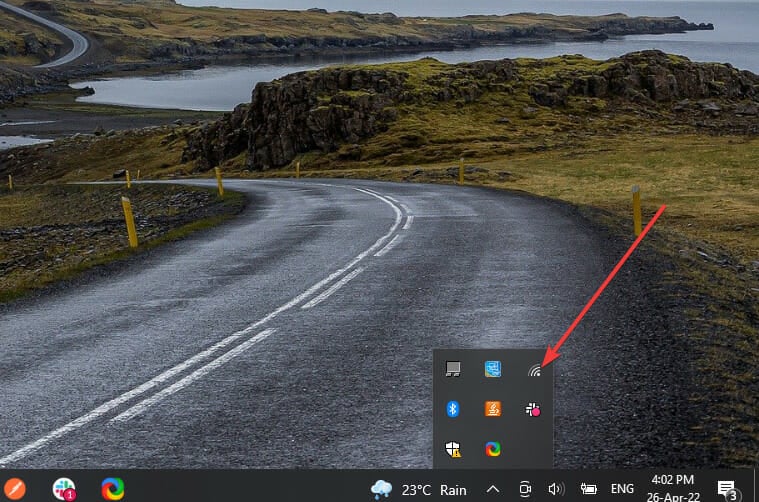
- Go to your network connections Window on the Taskbar. This should be on the bottom right part of your computer.
- Click on the network icon.

- You’ll see a list of available networks including the one you wish to connect to.
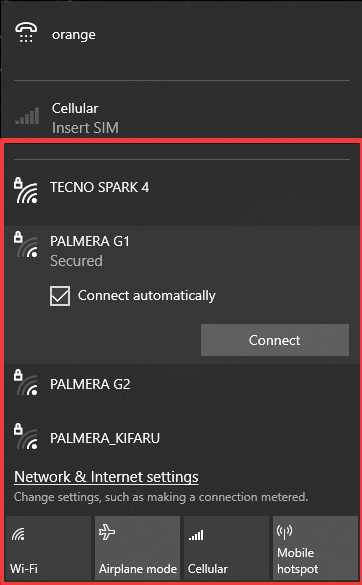
- Click on the network.
- You will be asked for a network security key.
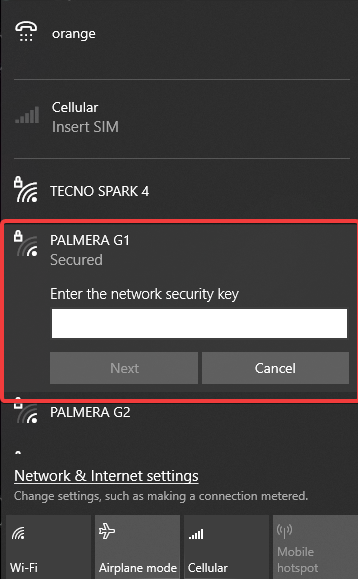
- Make sure to input the right password.
- Check if the connection works successfully.
2. Check with another device
If you are using the correct credentials, and still can’t get the network settings from the router, the issue could be your router.
The best way for checking this is to use another device other than your Windows computer to connect to the same router.
If the device connects successfully, then the issue is your Windows device. However, if the other device also fails to connect, the issue could be your router.
3. Stop and restart network connections
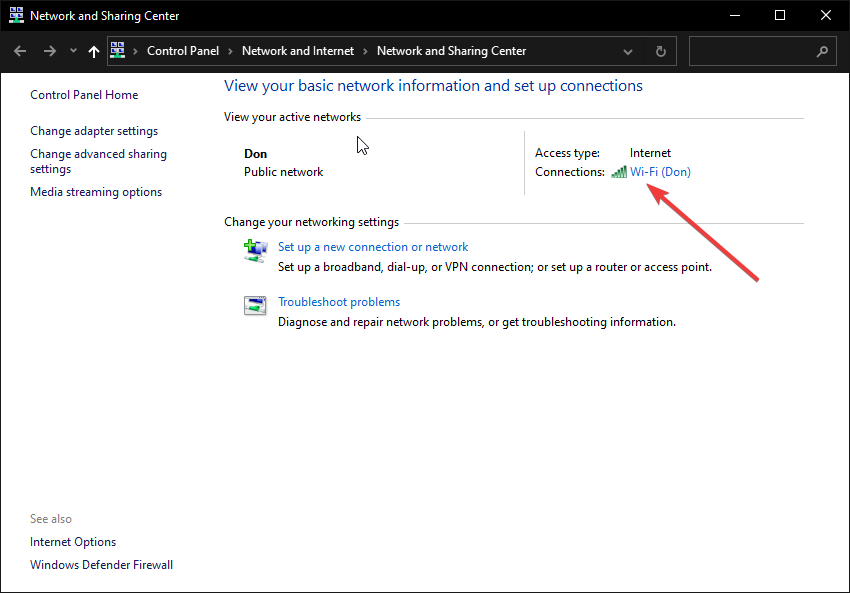
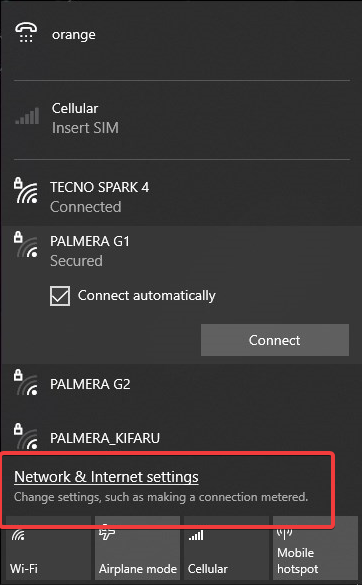
- Go to your network connections Window on the Taskbar. This should be on the bottom right part of your computer.
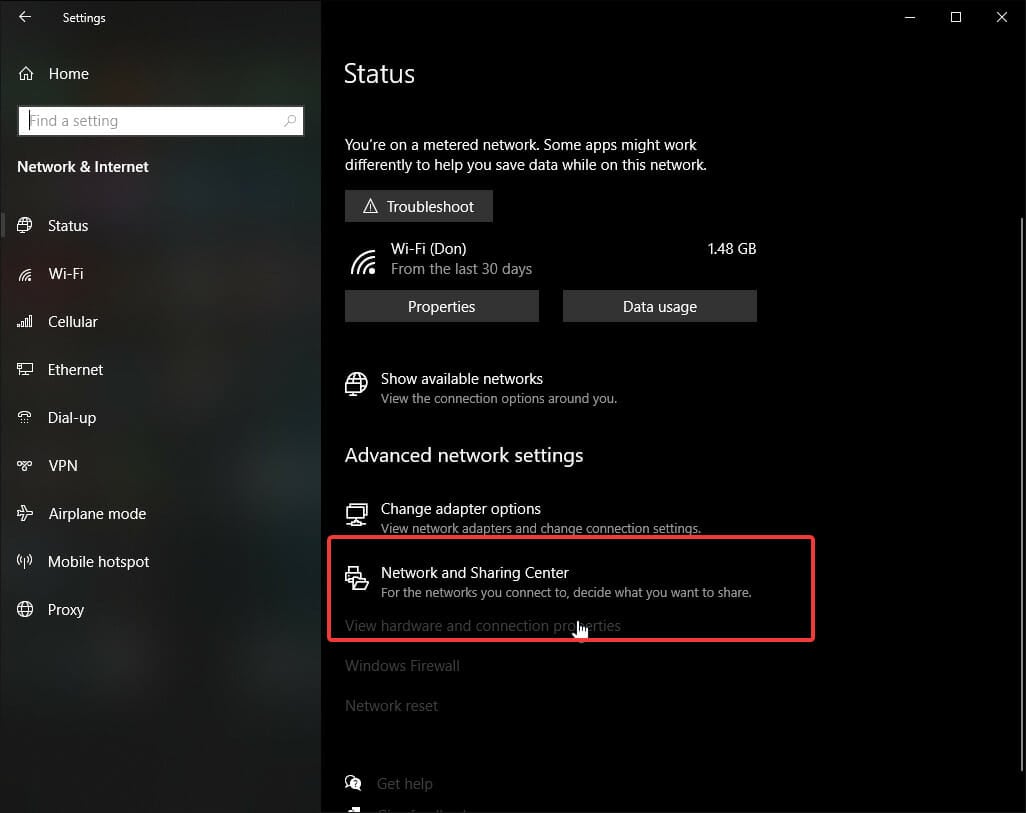
- Click on the Network and Internet Settings link.

- Once this window opens, click on the Network and Sharing Center.

- You will be shown your active networks.
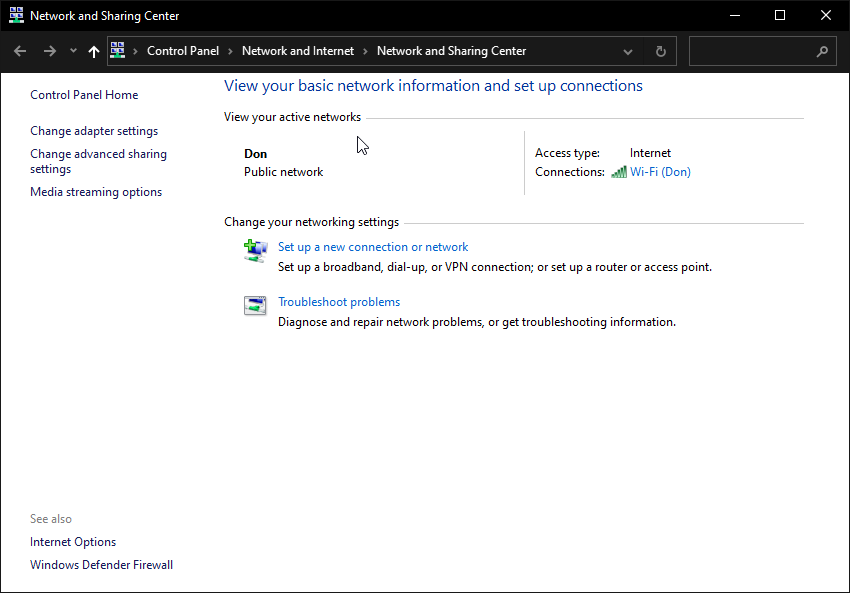
- Click on the network next to Connections.
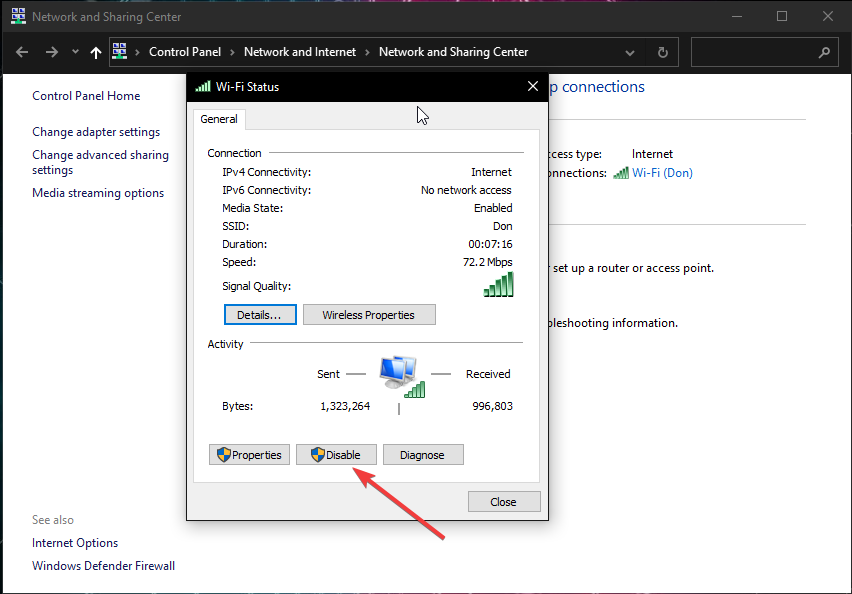
- You will get your Wi-Fi status window.
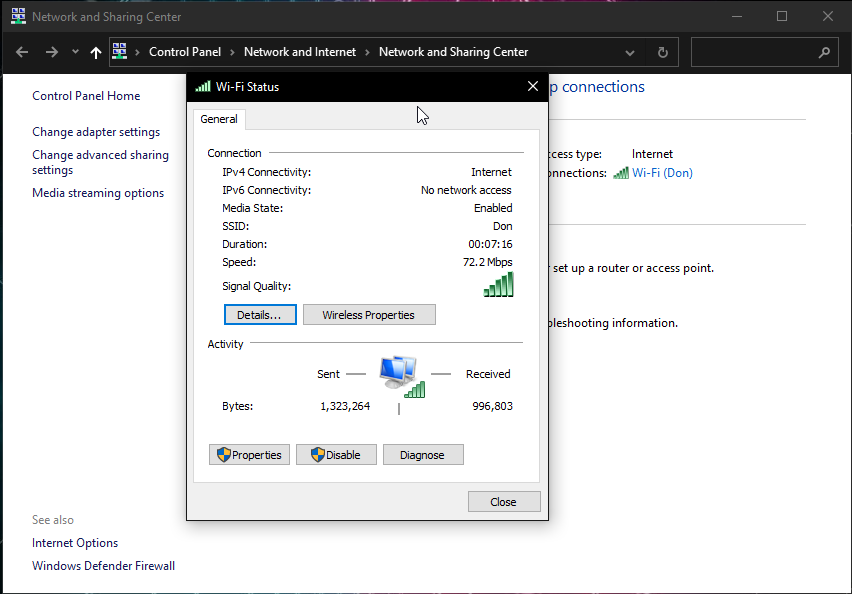
- Click on Disable network to close down your wireless connections.
- Type Windows + R buttons on your keyboard to open your Runbox.
- Type devmgmt.msc and click enter.
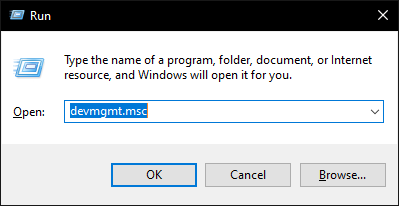
- This will open up the list of drivers. Look for your disabled driver on the Network adapters tab.
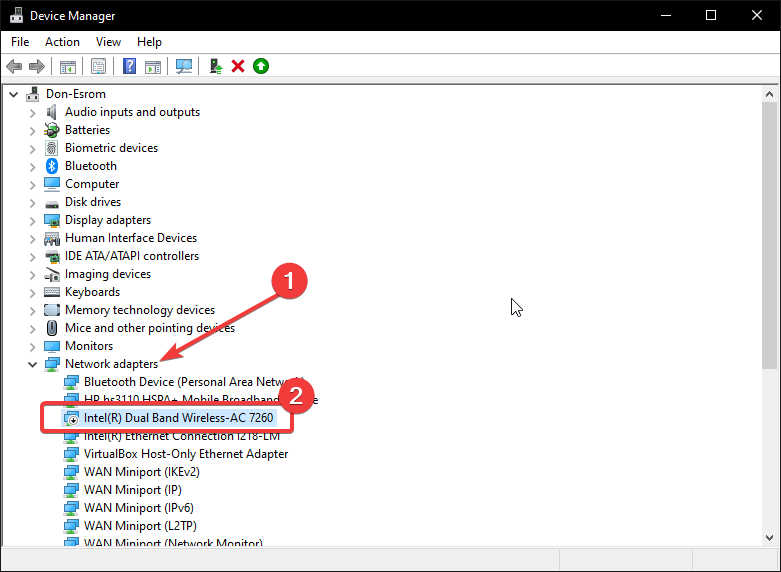
- Right-click on the disabled adapter.
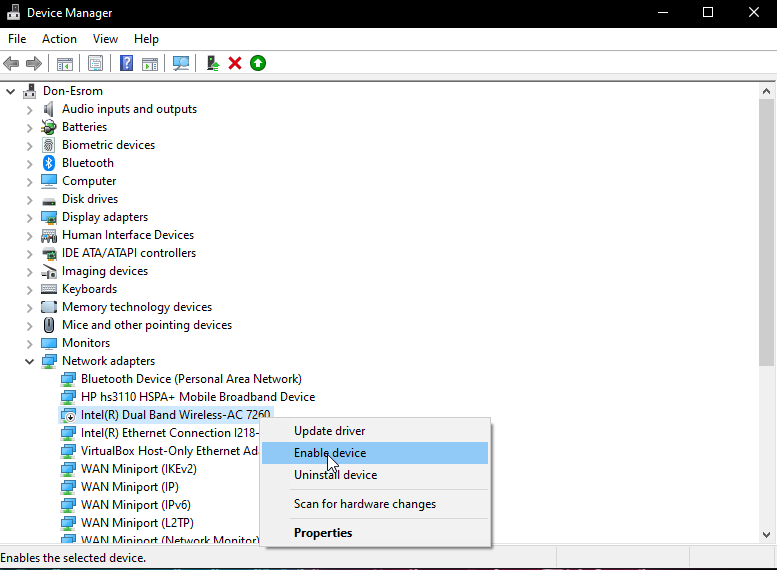
- Click enable and check whether the connection works.
4. Power cycle your router
- Switch off your router and disconnect it from its power source. This includes removing batteries if it uses any.
- Wait for a minute before hooking it up on power and switching it on again.
- Try connecting your Windows device with Wi-Fi and see it if works.
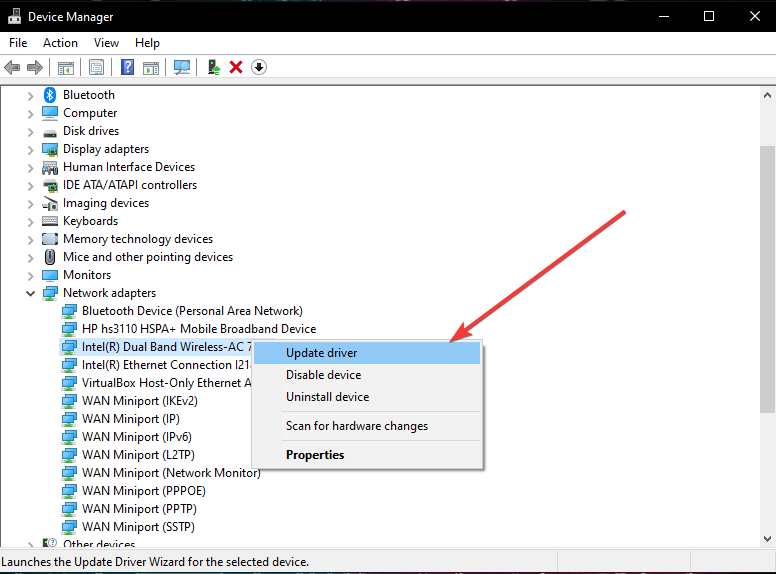
5. Check your device drivers
5.1. Update Device Drivers
- Click the Windows key + R on your keyboard to open the Runbox.
- Type devmgmt.msc to open the device manager.
- Scroll down to network adapters.
- Click on Network adapters to reveal all the connections available for your device.
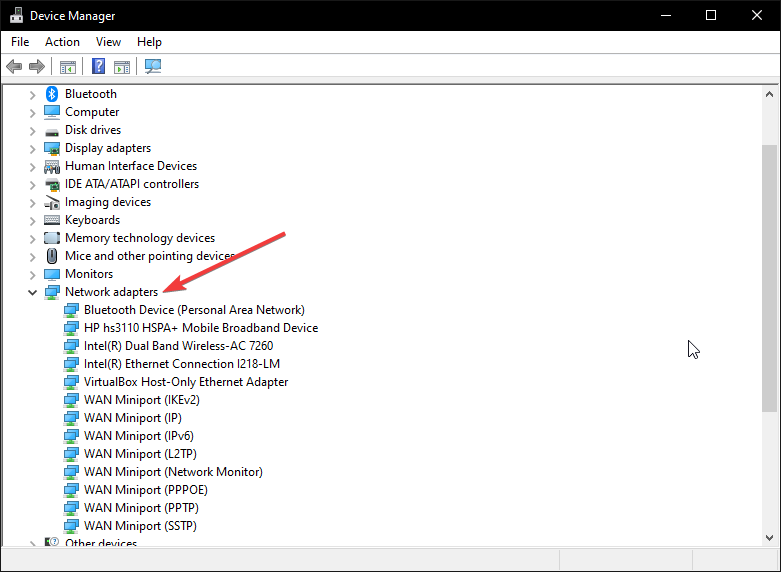
- You should see your Wi-Fi router or dual-band wireless adapter.
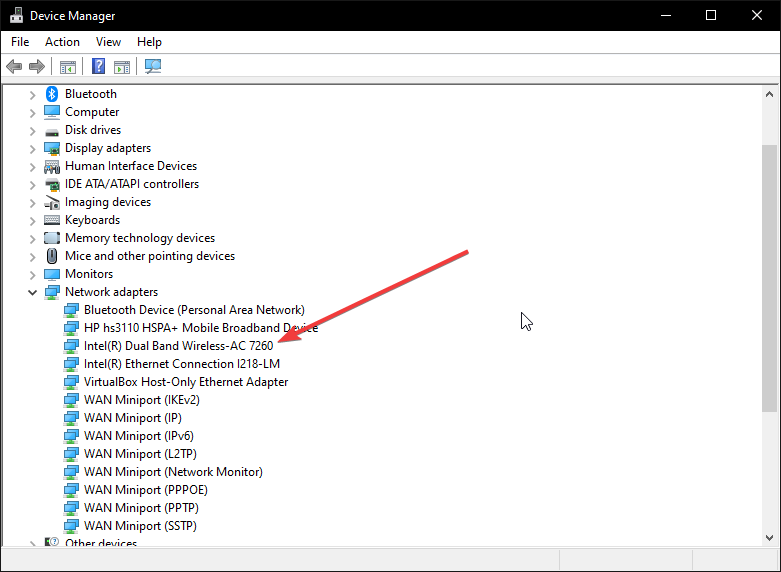
- Right-click on the adapter to open a window.
- Click on update driver.
- The computer will ask you how you wish to search for drivers.
- Select the Search automatically for Driver option and wait for the system to look for and update the drivers.
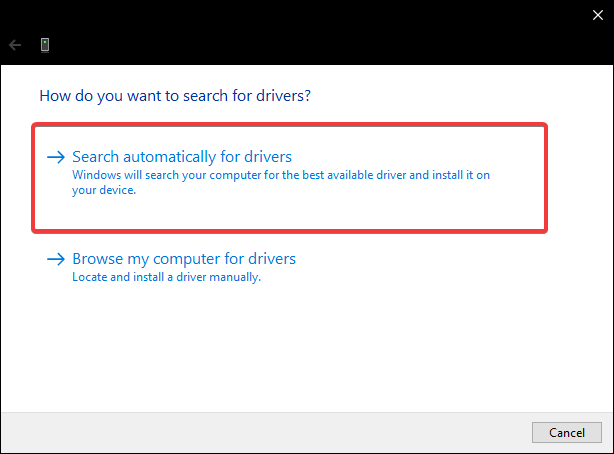
- Once the updates are successful, check whether your internet connection will work.
5.2. Disable and enable drivers
- Windows might tell you that you are already using the latest form of driver.

- Close Update Window and go back to your device manager window.
- Scroll down to network adapters.
- Click on Network adapters to reveal all the connections available for your device.
- Right-click on the driver to open a window.
- Click on Disable device and wait for the process to finish.
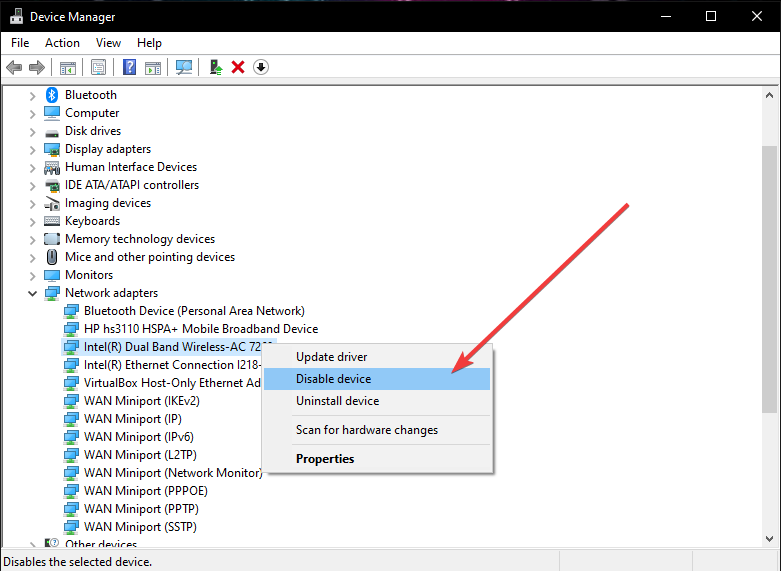
- Once done, restart your computer. Windows will automatically restart the device driver.
- Check if your Wi-Fi is connected again.
Note that to successfully update your drivers, you might be required to use an internet connection.
It helps to use another different source of internet for this exercise before you can fully restore your main source of internet connection.
If you want an automatic solution that is able to verify whether your drivers are corrupt or outdated and automatically fix them, you can use dedicated software.
We suggest DriverFix because it’s capable to handle any type of Windows driver, using its own up-to-date database. It’s lightweight, so it can regularly update your drivers while running in the background.
⇒ Get DriverFix
6. Turn on Network discovery
- Go to your network connections Window on the Taskbar. This should be on the bottom right part of your computer.
- Click on the Network and Internet Settings link.
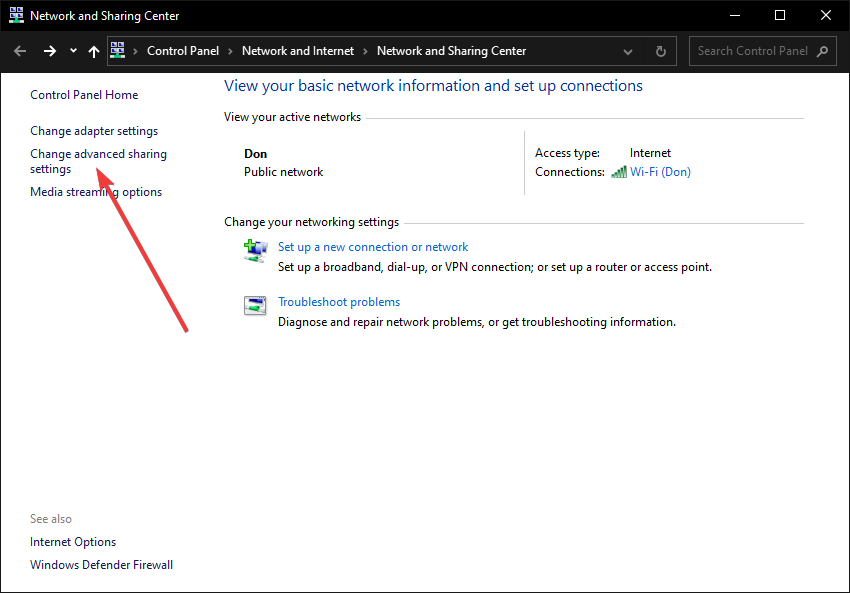
- Once this window opens, click on the Network and Sharing Center.
- Select Change advanced sharing settings.
- Select the Turn on Network discovery tab and save changes.
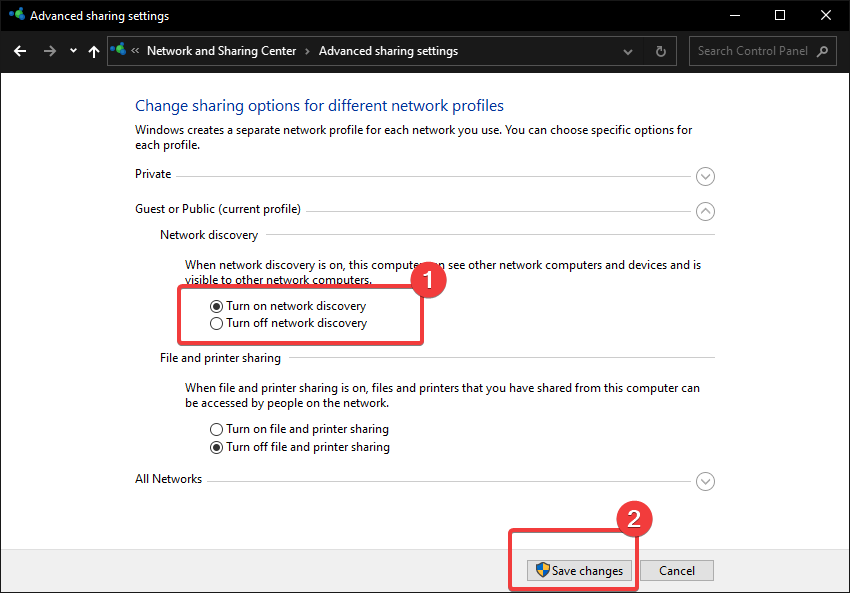
Network discovery allows your computer to see other network computers and devices. It also makes your computer visible to other devices and computers that share the same network.
7. Run Troubleshooter
- On your search button on the bottom left part of your screen, click on the search icon.
- Type Network troubleshooter.
- It will bring you a Find and Fix network problems app.
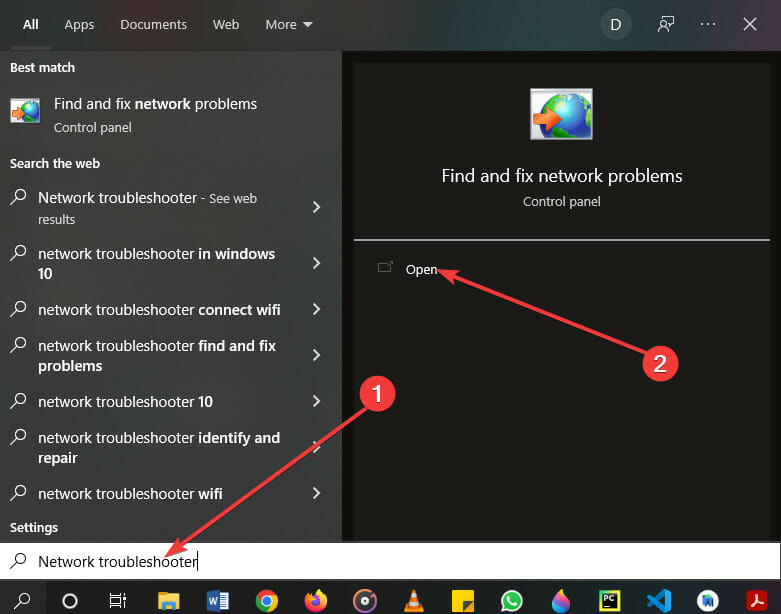
- Open it and click next.
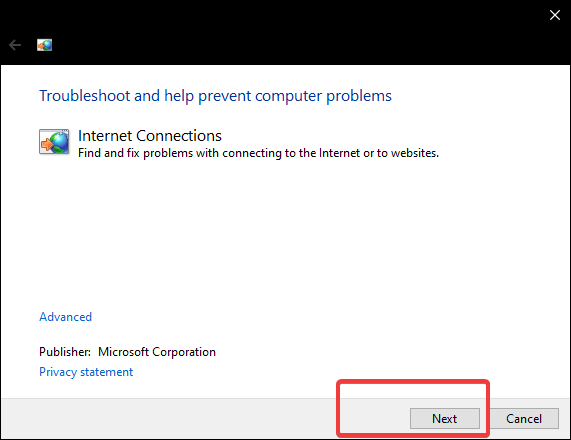
- This will activate the troubleshooter.
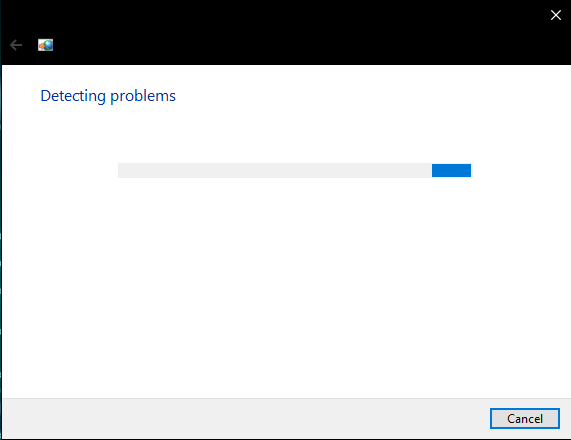
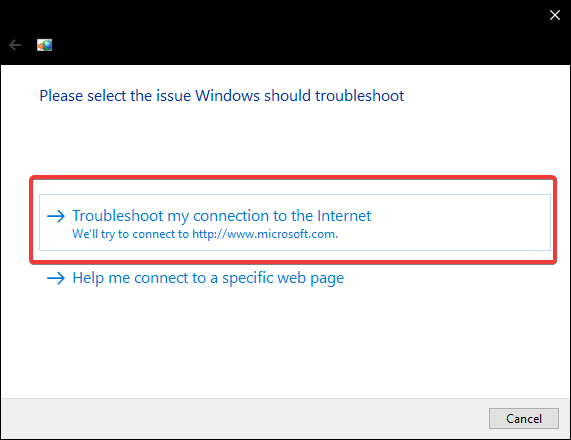
- Once the troubleshooter starts, you will be given two options.
- Troubleshoot my connection to the internet
- Help me connect to a specific web page.
- Click on the first option and wait as the troubleshooter run.
- If there are issues your troubleshooter will list them down and ask you to fix these issues.
- Connect your computer to your router and check whether the issue is solved.
Did any of the solutions work for you?
You might also want to consider changing your router if the problem persists. Sometimes, your router could be the problem, and changing it will fix the issue.
If you have any other issues with your network connections on Windows, feel free to check out our articles for more guidance.
If you know any other way of fixing the Windows that can’t get the network settings from the router errors, feel free to share it with us in the comment section.

Start a conversation
[ad_2]
Source link