
Escape Academy Final Puzzle Guide: All Test Solutions, Morse Code, And More
[ad_1]
The climactic battle at the end of Escape Academy is another gauntlet of puzzles, not unlike the rival challenge seen earlier in the game. However, if you don’t want to be put into status afterward, there are some important steps you’ll need to go through. It’s time to show your professors just how much you’ve learned. No pressure. We’re here to help you ace this impromptu final exam.
Getting started
The first area of the challenge is more about gathering the tools you need rather than baking your noodle. First, you’re going to need the headmaster’s glasses which are found on a bust of her face on the right side of the room. This will reveal hidden drawings on the wall.
Next to the bust is a row of five lockers, with one of them being locked. Pop open all the unlocked ones, and you’ll see symbols at the back of them. These are numbers beneath rotational arrows. You’ll probably recognize them as instructions to unlock a dial padlock. Use these steps to unlock the safe at the end (left to 10, right to 25, left to 15). You’ll be awarded the headmaster’s pin and a test sheet.
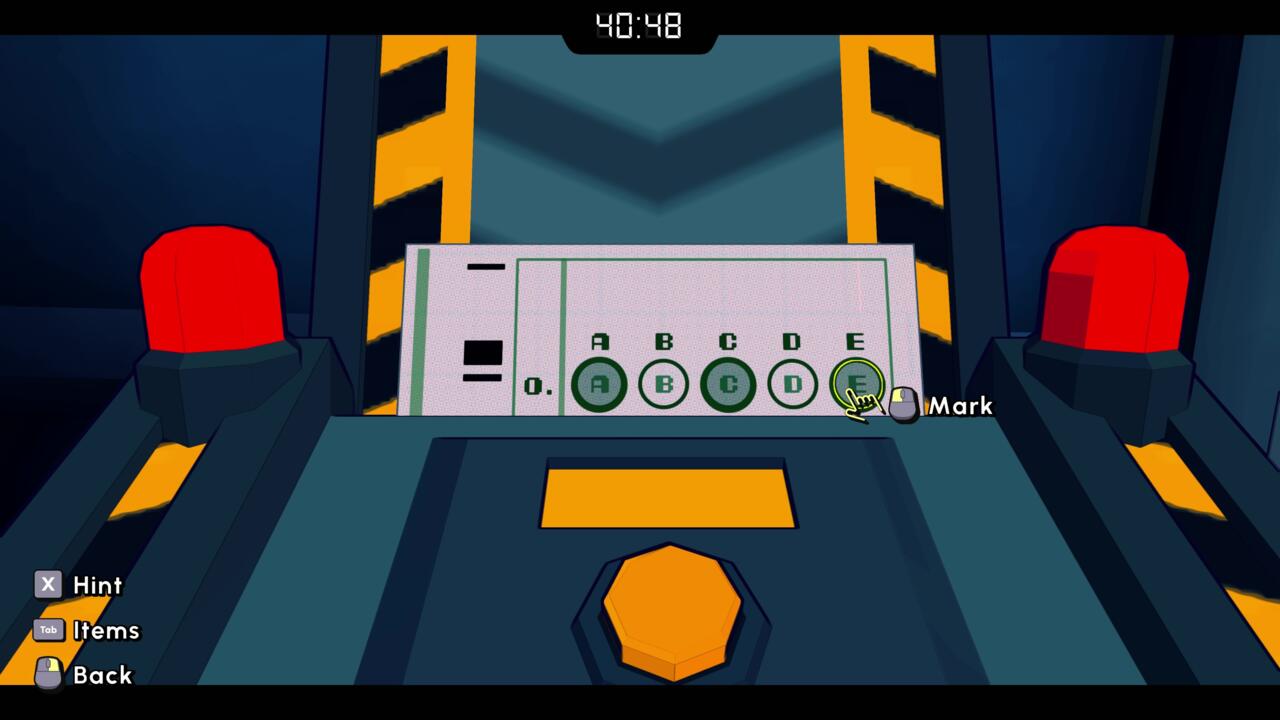
There’s one last step to get through to the next chamber. You’ll need to scan that test sheet, but with no questions, what circles should you fill out. A poster nearby says that only an “ace” will get through. This is a sly way of telling you to fill the dots A, C, and E. Once you’ve got those punched in, hit the button to scan the test, and the door will open. Before you leave, retrieve your test paper. You aren’t done with it.
Test Chamber 1 – Disco inferno
Before you begin this test, there’s an item you’ll want to grab for later. Look for an eye marking scrawled on the wall by the headmaster. Beneath this is a shelf, and on the shelf is a depleted 12V Battery. Stash this away, as while it isn’t necessary for solving the puzzle, you will need it later.
Now, turn your attention to center stage, where there is a 5×5 arrangement of colorful tiles. This area is dominated by a computer screen and flanked by what looks like propane flame throwers hooked up to a series of buttons. You can thankfully poke around with these buttons without getting a faceful of flame. However, there’s a method to finding which ones to poke.
On the screen is a picture of a combination of tiles. The goal of the puzzle is to follow them to a flamethrower at the side of the platform. This is pretty straightforward, but note that one gives you a strange pattern that seems to take you to the central screen. Just remember, nothing says you can’t cross the same square twice to complete the sequence. On the blue, red, magenta, red, teal instruction, backtrack from magenta to red to complete the sequence.
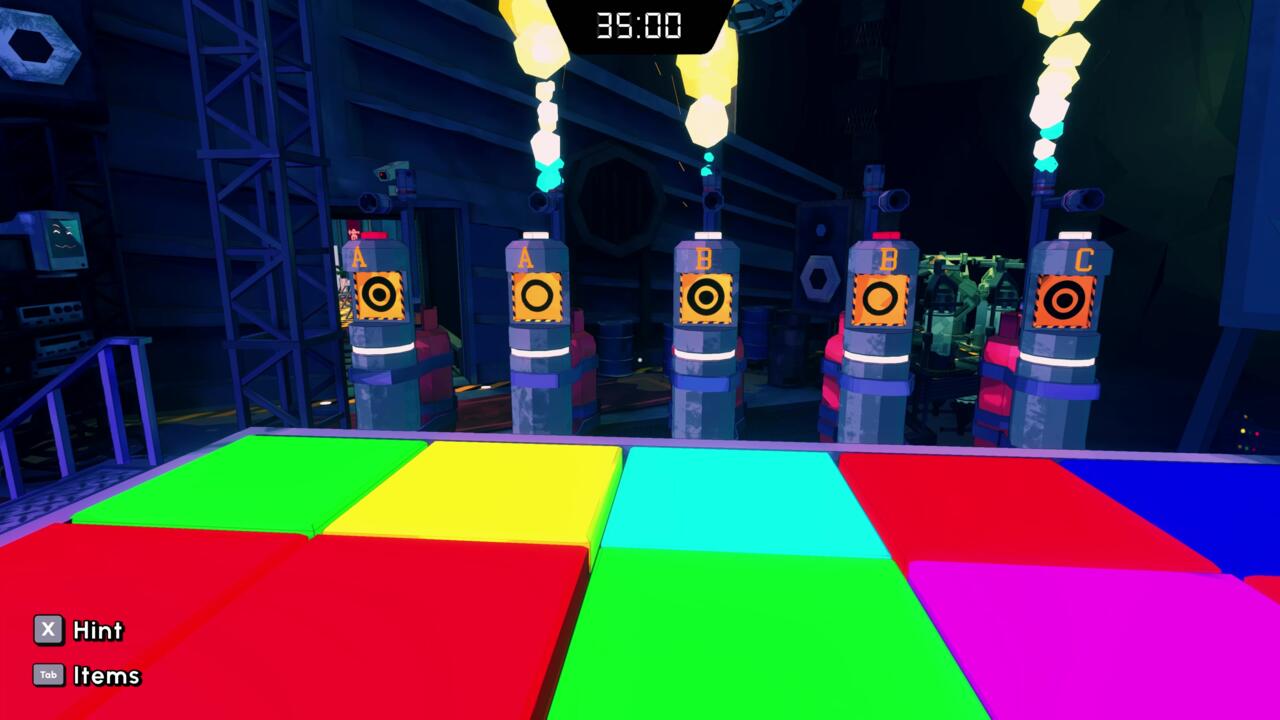
Once the puzzle tells you to exit, there’s one more step. You’ll need to look at all the active flamethrowers and check which ones are marked with a dot inside a circle. These indicate what places you need to fill out in your test sheet. Slide your sheet into the scanner, then fill in the dots (B, C, D). Hit the button, and the door should let you into the next chamber.
Test 2 – Pipe mania
The second chamber holds a puzzle that should be familiar to anyone who remembers the hacking mini-game in Bioshock, which itself is based on an old Lucasfilm game called Pipe Mania. There are a number of junctions on a tiled grid, and your job is fortunately not to simply join them all in a journey to the endpoint. Instead, you simply need to create a circuit from beginning to end and find the junctions that light up green when connected.
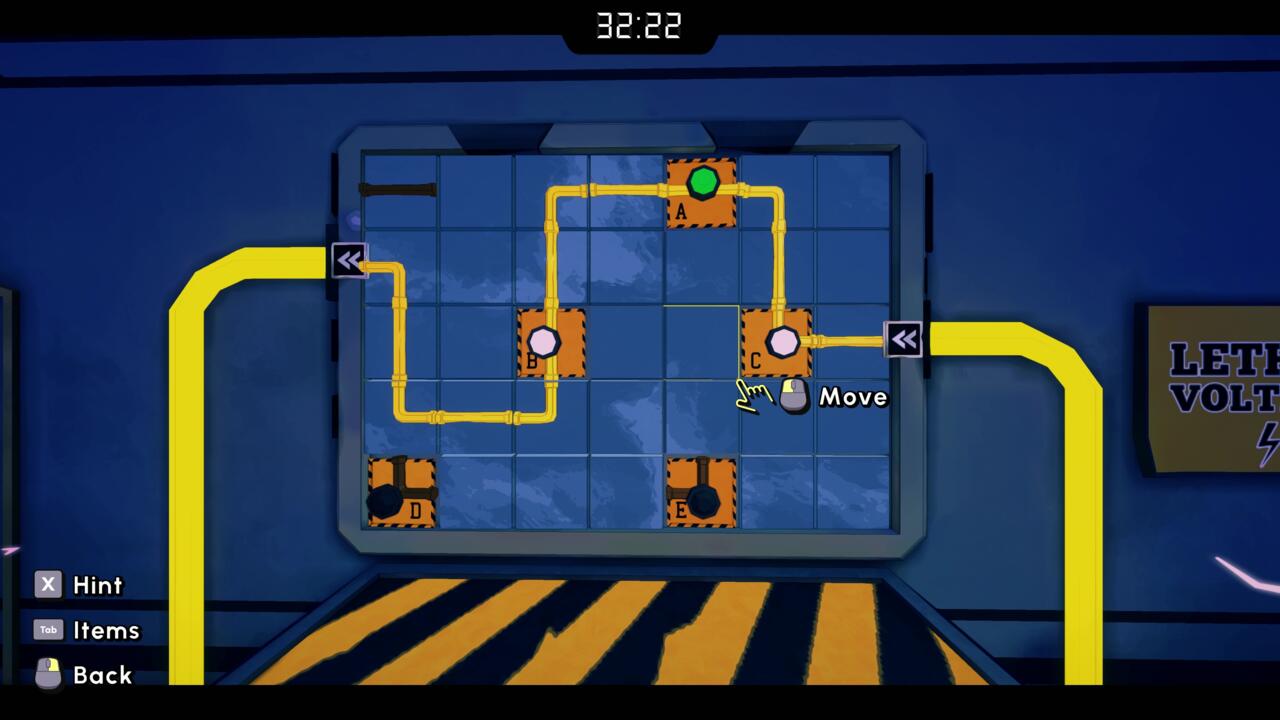
There are a few approaches to this. One is to simply power up each junction individually in order to locate the ones that light up green (or eliminate the white ones.) However, you may find it more efficient to create a circuit that joins multiple junctions. Whichever way you choose to do it, there are three green lights in the pattern. Mark these down on your test sheet (A, D, E) and give it a scan. Don’t forget to grab it back
Before proceeding, make sure to visit one of the large dynamos in the room. Use your 12V Battery on them to charge it. Once again, this is for later, but it will save you some backtracking.
Test 3 – Pillars of power
As you walk to the third chamber, you’ll notice a vent on the wall underneath one of the headmaster’s symbols. You can ignore this for now, as you won’t be able to complete the puzzles past it until you have more items, but if you’re curious, it can be opened using the headmaster’s pin.
The third puzzle of Quanty’s tests involves moving pillars across a track on the floor. If you check the wall, you’ll see signs for the letters A-E. A closer inspection will reveal they’re in Morse code. These consist of a series of dots and dashes unique to each letter.
To figure out this puzzle, you’ll need to look at the flashing lights at the top of each pillar. They will blink in patterns that match the morse code on the signs. You need to match a pillar to the letter they’re flashing out, then move that pillar onto where the letter appears on the track. Be careful because if you take your eyes off a light before its sequence is completed, it’s easy to mistake one for another.
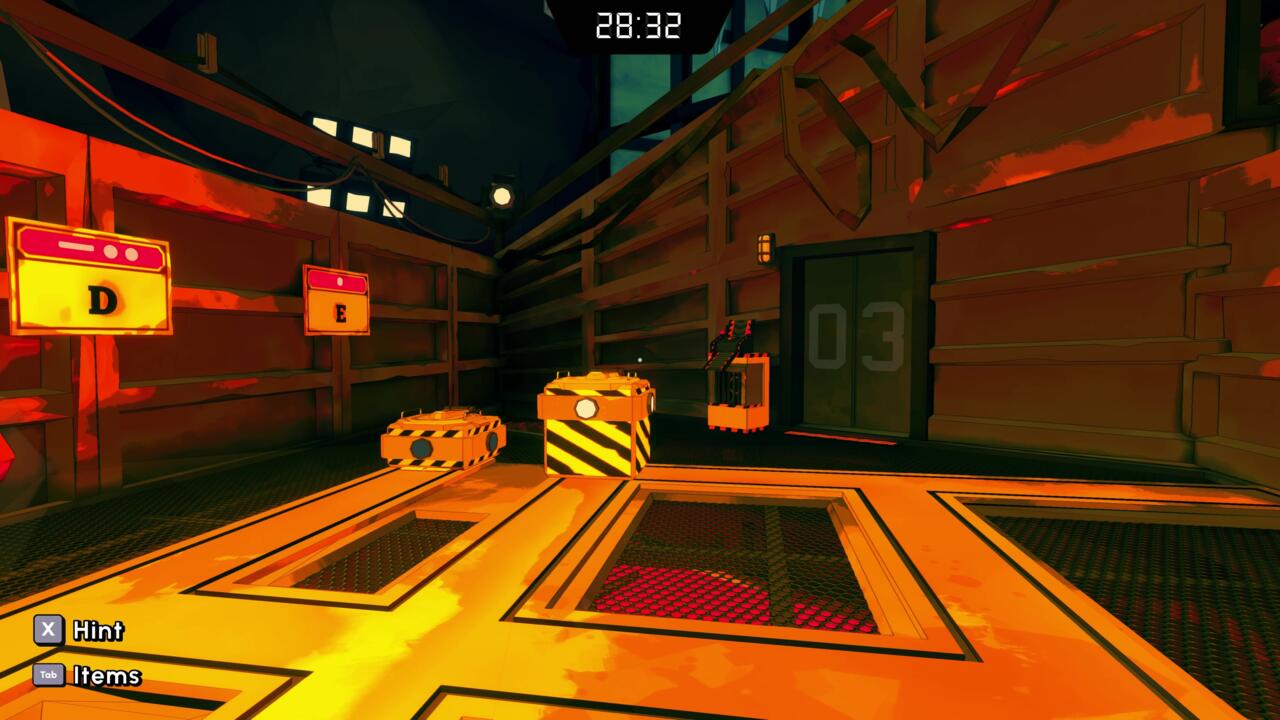
If you set the pillars in all the right places, the tops of them will open up. Within, you’ll see a letter and a circle. Some of these circles are filled with dots, and those indicate the letters on your test sheet you need to mark down. Note that for the first time, there are only two letters (B and D) you need to fill in before scanning.
Puzzle 4 – It’s a gas
The last of Quanty’s puzzles is something of a head-scratcher. To start off, grab all the tanks off the racks to the left of the entryway. These are marked A-E. Each one contains a different chemical. Mixing these together in the machine that dominates the chamber will produce different colored crystals, and you can compare these colors with a guide next to the machine to help try and figure out what is in them.
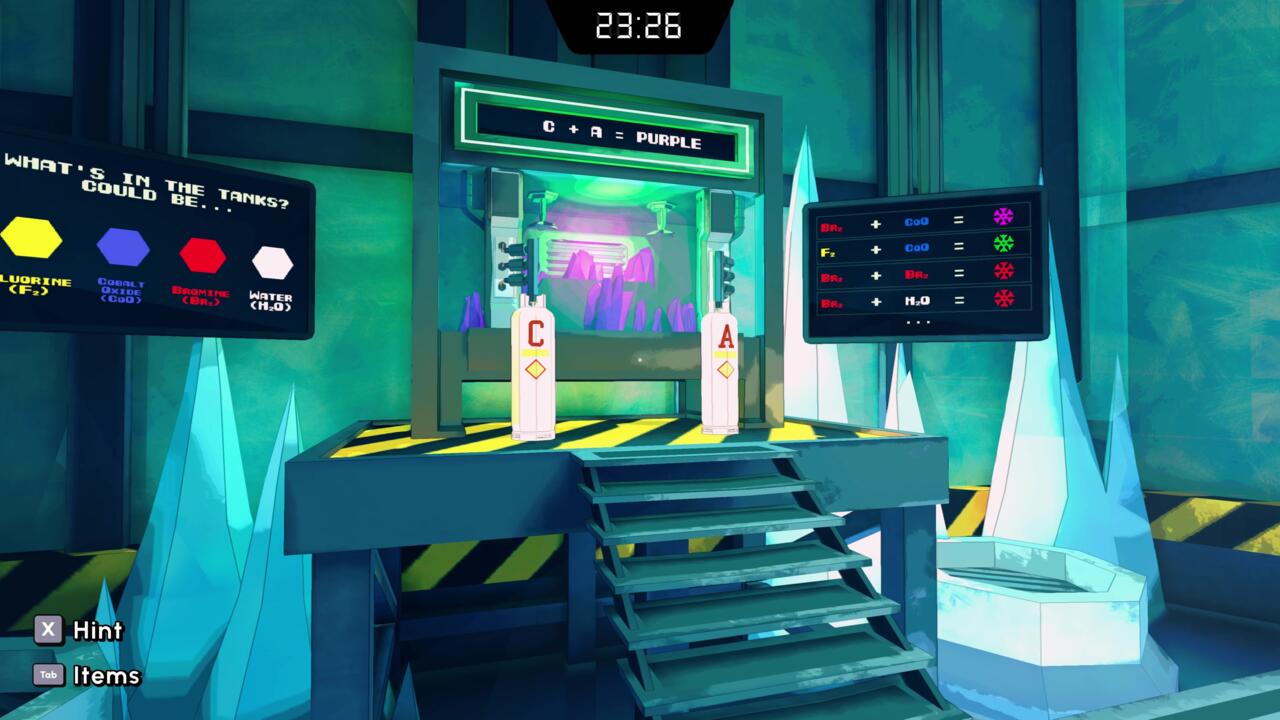
The goal here is to find out which one contains H2O. This generally means a lot of trial and error, but there is a procedural way to find what you need. Start by putting the A tank on one side, then the B tank on the other, and check the color of the crystals. You’re looking for red. Replace the ones on the right side until you get red crystals. Note that two combinations produce these crystals: bromine and water, as well as bromine and bromine. Once you get the red crystals, start swapping the left canister. If you don’t see red crystals again, through the process of elimination, you can confirm the right canister contains H2O.
Of course, if that sounds like too much of a pain, the answer is D. Mark this on your test sheet and scan it. Make sure you pick up the D canister again. You’ve now completed all of Quanty’s tests, but you’re not done yet.
Quanty – Phase 1
Between the second and third chamber is a vent cover. With the headmaster’s pin, you can unscrew this and enter Quanty’s chamber. Within there are three nodes surrounding a pit. You have everything you need to solve these.
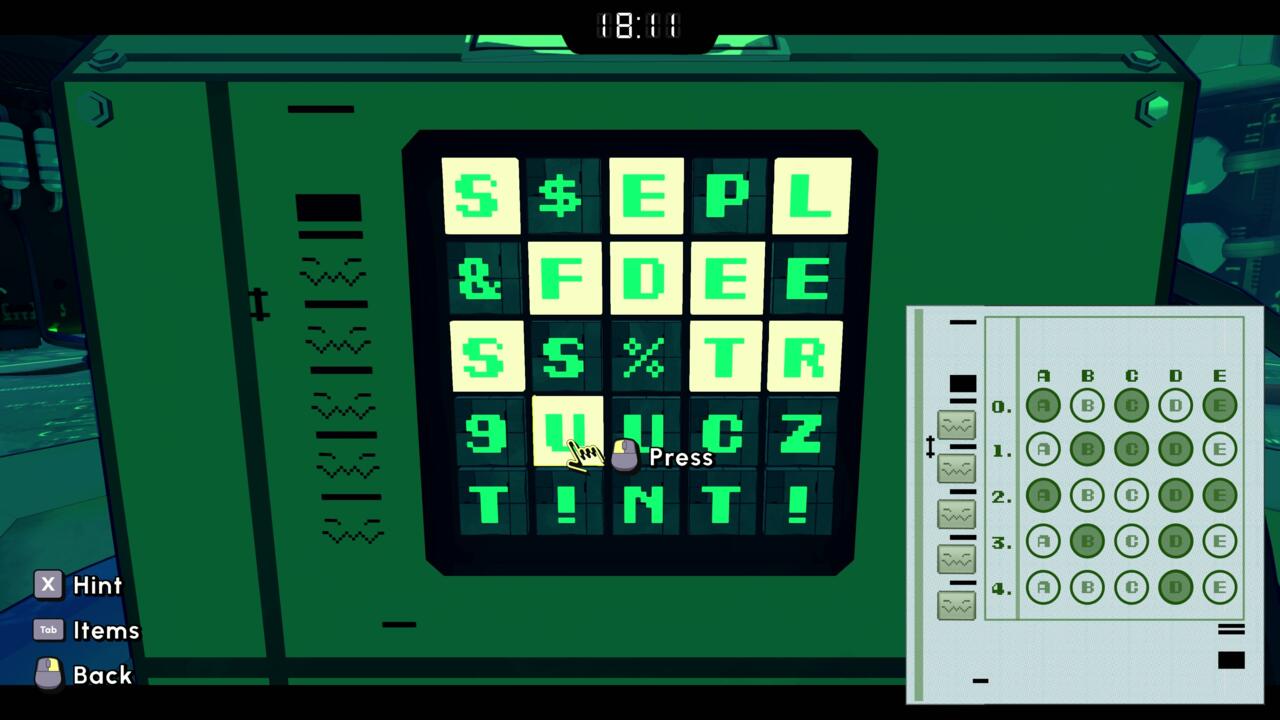
Starting with the node to the right of the entrance, you need to use the charged 12V battery on it. Next, clockwise from there, you need to use the water canister (D) to short out the circuit. Finally, on the last one, you’ll find a 5×5 grid with various characters on it. Bring up your test sheet and press the buttons that correspond to the marked circles on the completed test. This should spell out “SELFDESTRUCT.”
Now, you need to get up to the ledge overlooking the pit. To do this, you must exit Qaunty’s chamber and circle around to chamber 3 (the one with the pillars.) To the right of the entrance is a ledge with one of the headmaster’s markings on it. Getting up there is a simple matter of arranging the pillars from smallest to tallest against the far corner of the track (the part that comes closest to the ledge.) You will then be able to use them as steps to climb up to the ledge. At the top is another vent cover that you can remove with the headmaster’s pin.
The vent will take you back into Quanty’s chamber. Press the button marked “Do Not Press.” This will expose Quanty. Rather than circle back the way you came, there’s a ladder you can interact with that will get you back down to the lower level.
Quanty – Phase 2
There are a series of screens surrounding Quanty’s face. Going clockwise from his screen, the first one says “Total control is just the start” with “start” being highlighted alongside the word “opposite.” The solution is simply to spell “stop” in the space below.
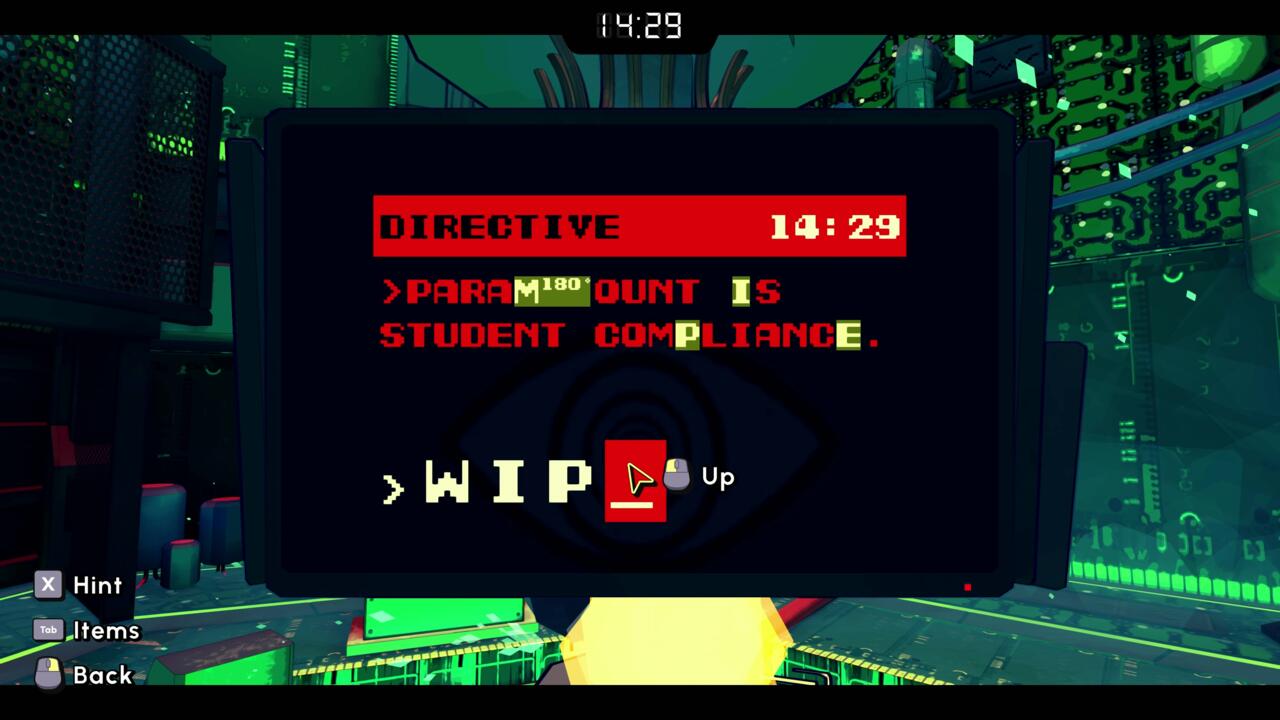
The next screen says “Paramount is student compliance” with M180, I, P, and E highlighted. You need to spin the M to make a W, at which point the code to enter is “wipe.”
Up next is “Friendship is a waste of resources.” F, H, S, E, and R are highlighted and flanked by numbers. These numbers indicate what spaces these letters land in. Decode the message and you end up with “refresh.”
Finally, we have “Fun is a form of inefficiency.” S, M, F, and N are highlighted with a number next to them that is either plus or minus. To solve this puzzle, you either need to go up or down the alphabet depending on what the symbol next to the number indicates. So S would become U and F would become D. Do this for all letters, and you will come up with “Undo.”
Quanty – Phase 3
Once you’ve solved all the screens, Quanty’s face will display a file called “Prime Directive”. Click on this, and you will be given one last puzzle: “Create the best escapists, no matter the cost.” E, T, P, N, and O are all highlighted, and the whole message is encased in brackets that say “opposite.”
You’ll have to figure out the word it gives you before you can find the antonym, so ignore the brackets for now. The letters are flanked with numbers indicating movements you are familiar with by now. They dictate where the letters fall in sequence. T, however, is marked with +1, so you first need to change this into a U.

Put this together, and you wind up with “open up.” What’s the opposite of that? “Shut down.” In retrospect, that seems obvious. Input this, and Quanty will go into boss destruct mode. You’ve passed your first semester of Escape Academy (I assume). Unfortunately, most people don’t lock their doors with disco floors, so you might not get much out of that degree.
GameSpot may get a commission from retail offers.
The products discussed here were independently chosen by our editors.
GameSpot may get a share of the revenue if you buy anything featured on our site.
[ad_2]
Source link


